How to Cut LED Strip Lights Without Damaging Them

Cutting LED strip lights is usually simple. The problem is that many people assume it can be done anywhere along the strip. That is where mistakes happen. Most LED strip lights can only be cut at marked points. Cut through the wrong section, and you may damage the circuit or lose part of the strip.
This guide explains how to cut LED strip lights properly, how to find the correct cutting points, and how to avoid the common mistakes that turn a quick job into a wasted strip.
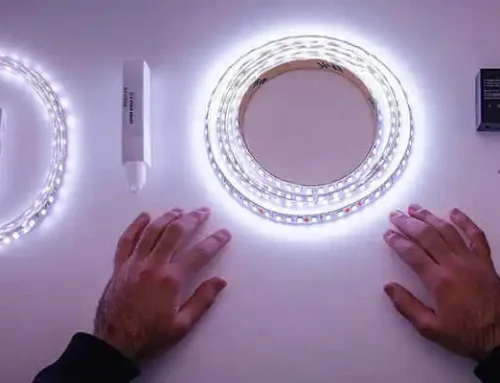
What You Need Before You Start
You do not need a full toolbox for this job. A few basic items are enough.
Here is what helps:
- a sharp pair of scissors or a precision cutter
- a measuring tape or ruler
- a pencil or marker if you want to mark the length first
- a connector or soldering tools if you plan to reuse the leftover piece
- a clean, flat surface with good light
Before you do anything else, disconnect the strip from power. That may sound obvious, but it is one of the easiest steps to skip when the job looks simple.
It also helps to slow down for a minute and check the strip itself. Not every strip has the same cut interval. Some cut every few centimeters. Others have much longer sections. If you assume instead of checking, you can end up with the wrong length before you even start.
How to Cut LED Strip Lights Step by Step
Step 1: Measure the space
Start by measuring the area where the strip will go.
Do not measure roughly and hope for the best. LED strips are flexible, but installation still looks better when the length is right. Measure the surface carefully, then compare that number with the nearest cut mark on the strip.
In some cases, the exact measurement will not land perfectly on a cut point. When that happens, cut at the closest marked line that still fits the installation. It is better to leave a little extra room for routing than to cut too short and have no way to fix it cleanly.
Step 2: Find the cut mark
Once you know the length you need, find the correct place to cut.
Most LED strip lights have a printed cut line, a small scissor icon, or exposed copper pads that show where cutting is allowed. These marks are built into the strip design. They are not decoration. They tell you where one working section ends and the next begins.
If you do not see a cut mark, stop there and check the product instructions. Do not guess. A strip may look like one continuous ribbon, but the electrical circuit is divided into sections. Cutting through the wrong part can break that circuit.
Step 3: Turn off the power
Make sure the strip is unplugged or fully disconnected from power before cutting.
This is not just a safety step. It also gives you a better chance of making a clean, controlled cut without rushing. If the strip is still connected, set it aside, disconnect the power supply, and then bring it back to the work surface.
A quick pause here can save a surprising amount of trouble later.
Step 4: Cut at the marked line
Lay the strip flat and cut straight across the marked line.
Use sharp scissors or a precision cutter. A clean cut matters. Dull tools can crush the PCB or leave a ragged edge, which makes reconnection harder if you want to use the remaining piece.
Do not cut beside the mark to “fine-tune” the length. And do not cut through the middle of a segment. If the strip needs to be slightly shorter, you still have to respect the nearest cut point. LED strips follow the circuit layout, not the installer’s wishful thinking.

Step 5: Test the strip
After cutting, reconnect the strip and test it before installation.
If the powered section lights up normally, you are in good shape. If it does not, go back and check whether the cut was made at the correct point and whether the strip was damaged during handling.
Testing before mounting is always easier than troubleshooting after the strip is already inside a cabinet, ceiling recess, or aluminum profile.
What to Do with the Leftover Strip
If you cut the strip in the right place, the section connected to power should still work normally. In many cases, the leftover piece can still be used too.
That extra piece is not necessarily waste. It simply becomes a separate section. To use it again, you usually need to reconnect it to a suitable power source or join it with the right connector.
This is where many people either save money or create a second problem. Some keep the leftover piece for another small installation. Others try to reconnect it without checking the strip width, pin layout, or voltage. The strip itself may still be usable, but only if the reconnection method matches the product.
So before you throw the extra piece away, take a look at it. If it still has clean copper pads and the strip type is easy to reconnect, it may be useful for another project.
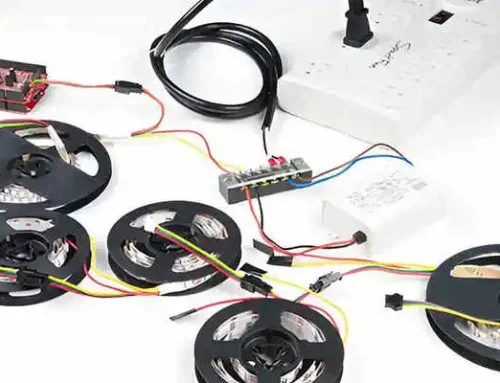
Can You Reconnect a Cut LED Strip?
In many cases, yes.
There are two common ways to reconnect a cut LED strip:
- clip-on connectors
- soldering
For simple single-color low-voltage strips, clip connectors are often the easiest choice. They are quick, clean, and beginner-friendly. If the strip width and pad layout match the connector, the job is usually straightforward.
Soldering gives you a stronger and more permanent connection, but it takes more care. It is often the better option when the strip will be installed in a fixed project, when the connector space is tight, or when the strip type is less forgiving.
Not every strip reconnects equally well. RGB, RGBW, CCT, and COB strips usually need more attention because there are more channels, smaller pads, or tighter layouts. Waterproof strips are another special case because the outer coating has to be dealt with before any reconnection can happen.
So yes, many LED strips can be reconnected. But the easy answer is not always the complete answer. The strip type still matters.

How to Cut Waterproof LED Strip Lights
Waterproof LED strip lights can usually be cut too, but they need a little more care.
The main difference is the outer protective layer. Depending on the product, that layer may be silicone, PU, epoxy, or another waterproof material. Once you cut through it, you are not just cutting the strip. You are also breaking the protective seal.
The first step is still the same: find the correct cut mark. But after that, you need to think beyond the cut itself.
If the strip will continue to be used in a wet area, outdoor location, or anywhere moisture is a concern, you may need to reseal the cut end. That often means using the right end cap, silicone sealant, or accessory designed for that strip. If you skip that step, the strip may still light up, but the waterproof protection may no longer be reliable.
This is why waterproof strips are easy to cut badly, even when they are easy to cut electrically. The light may work, but the protection may not.
So if you are cutting an IP65, IP67, or IP68 strip, do not treat it like a standard indoor strip. The cut is only half the job. Resealing is the other half. We recommend you tailor the waterproof strip length by your supplier.
FAQ
1. Will LED strip lights still work after cutting?
Yes, if you cut them at the correct marked line. The section still connected to power should continue to work normally.
2.Can I use the leftover piece?
Often, yes. The leftover section may still work, but it usually needs its own power connection or a proper reconnection method.
3. Can I cut RGB or COB LED strip lights?
Yes, many RGB and COB strips can be cut, but they are often more sensitive than simple single-color strips. Reconnection can also be more complicated.
4. Can I cut waterproof LED strip lights?
Yes, but you need to be careful. After cutting, the waterproof seal may be broken. If the strip will stay in a wet or outdoor environment, the cut end should usually be sealed again.
5. What happens if I cut in the wrong place?
You may damage the circuit and stop part of the strip from working. In some cases, the strip can still be repaired, but not always. That is why finding the correct cut mark matters so much.
Conclusion
Cutting LED strip lights is not difficult. Most of the time, it is a simple job.
The key is not force, luck, or speed. It is knowing where the strip is designed to be cut and taking a minute to do it properly. Measure the space, find the marked line, disconnect the power, cut cleanly, and test the strip before installation.
Do that, and you will usually get a clean result without damaging the strip.
If your project involves waterproof, RGB, COB, or custom LED strip lights, it is worth checking the product details first. A little attention before the cut can save a lot of frustration after it.